Booting Virtual Machines Using iSCSI: Part 2
Guest Provisioning and Installation
After going to all the trouble to get our specialized host configuration set, let’s see what creating a new iSCSI booting VM looks like. I’ll be using virt-manager as the primary interface into libvirt for all of this, and installing Fedora 19 as the guest OS.
Guest Setup:
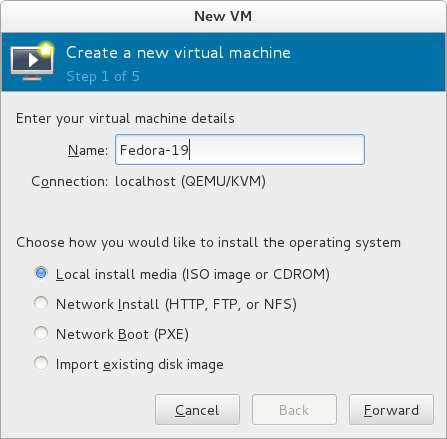
Create a New VM
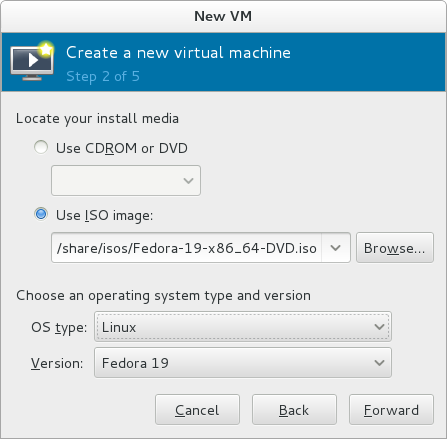
Setup a new VM, installing from an ISO image.
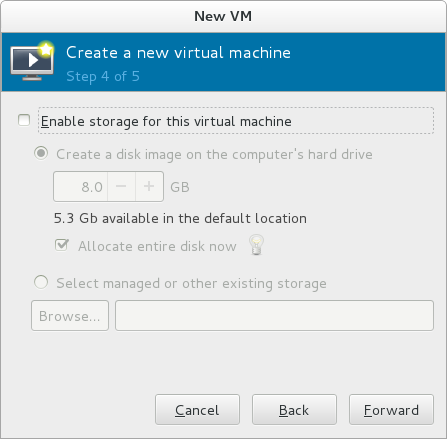
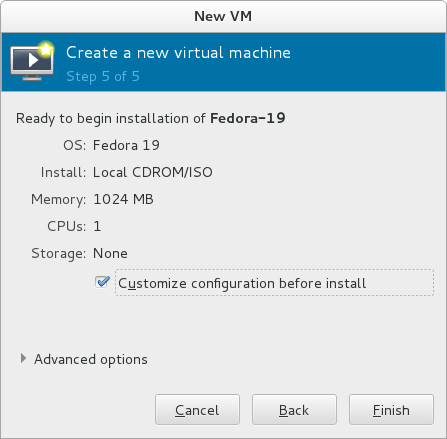
At step 4 things get interesting, disable all libvirt managed storage. In step 5, make sure to check “customize configuration before install” so we can do some further preparation.
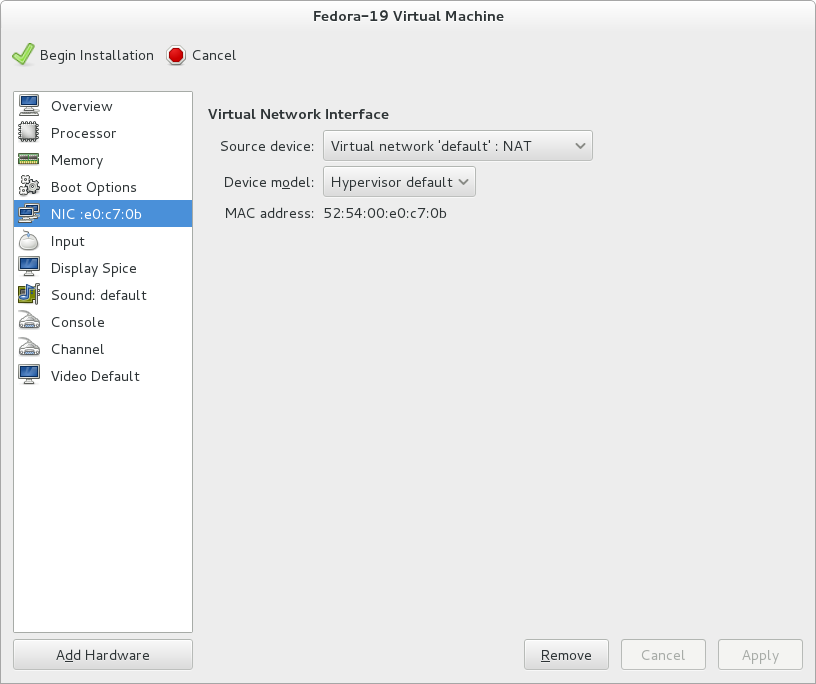
Make note of the MAC address
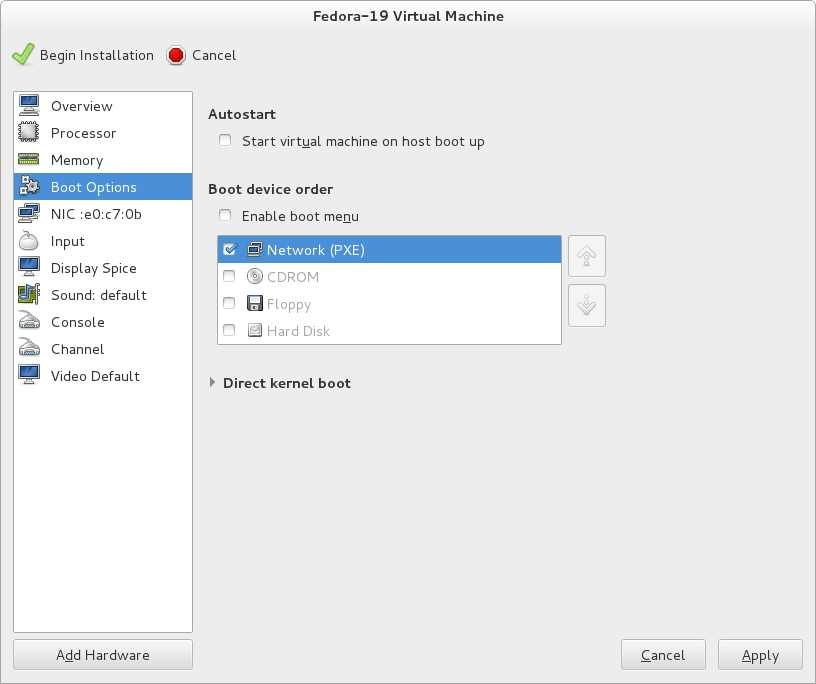
and set the boot device order to “Network (PXE)” only
Create the Logic Volume for the VM
Use virt-manager:
Edit > Connection Details > Storage > New Volume
or virsh:
$ virsh vol-create-as vg_guest_images Fedora-19 10G
or lvm:
$ lvcreate --size 10G --name Fedora-19 vg_guest_images
Assign Storage in the iSCSI Target
assign the LV to the target core as a block backstore
$ targetcli
targetcli shell version 2.1.fb30
Copyright 2011-2013 by Datera, Inc and others.
For help on commands, type 'help'.

/> cd backstores/block
/backstores/block> create dev=/dev/vg_guest_images/Fedora-19 name=Fedora-19
Created block storage object Fedora-19 using /dev/vg_guest_images/Fedora-19.
create a logical unit in the iSCSI target from the backstore
/backstores/block> cd /iscsi/iqn.1992-01.com.example:target.0/tpg1/luns
/iscsi/iqn.19...t.0/tpg1/luns> create storage_object=/backstores/block/Fedora-19
Created LUN 0.
create an access control list entry for the guest iSCSI initiator
/iscsi/iqn.19...t.0/tpg1/luns> cd ../acls
/iscsi/iqn.19...t.0/tpg1/acls> create wwn=iqn.1992-01.com.example:Fedora-19
Created Node ACL for iqn.1992-01.com.example:Fedora-19
assign the logical unit to the initiator
/iscsi/iqn.19...t.0/tpg1/acls> cd iqn.1992-01.com.example:Fedora-19
/iscsi/iqn.19...ple:Fedora-19> create mapped_lun=0 tpg_lun_or_backstore=0
Created Mapped LUN 0.
the final target config should look about like this
/iscsi/iqn.19...ple:Fedora-19> cd /
/> ls
o- / ..................................................................... [...]
  o- backstores .......................................................... [...]
  | o- block .............................................. [Storage Objects: 1]
  | | o- Fedora-19  [/dev/vg_guest_images/Fedora-19 (10.0GiB) write-thru activated]
  | o- fileio ............................................. [Storage Objects: 0]
  | o- pscsi .............................................. [Storage Objects: 0]
  | o- ramdisk ............................................ [Storage Objects: 0]
  o- iscsi ........................................................ [Targets: 1]
  | o- iqn.1992-01.com.example:target.0 .............................. [TPGs: 1]
  |   o- tpg1 ........................................... [no-gen-acls, no-auth]
  |     o- acls ...................................................... [ACLs: 1]
  |     | o- iqn.1992-01.com.example:Fedora-19 ................ [Mapped LUNs: 1]
  |     |   o- mapped_lun0 ......................... [lun0 block/Fedora-19 (rw)]
  |     o- luns ...................................................... [LUNs: 1]
  |     | o- lun0 ........... [block/Fedora-19 (/dev/vg_guest_images/Fedora-19)]
  |     o- portals ................................................ [Portals: 1]
  |       o- 192.168.122.1:3260 ........................................... [OK]
  o- loopback ..................................................... [Targets: 0]
/> exit
Global pref auto_save_on_exit=true
Last 10 configs saved in /etc/target/backup.
Configuration saved to /etc/target/saveconfig.json
Add a Host Entry in the DHCP Server
Add a host entry to the group section in the dhcpd configuration, connecting the MAC address created by libvirt with the iSCSI Qualified Name used in the target ACL.
/etc/dhcp/dhcpd.conf
1 2 3 4 5 6 7 8 9 | |
Restart dhcpd, which is the only way to get it to pickup changes to the config file.
$ systemctl restart dhcpd.service
Continue the VM Install
Go back to virt-manager, and start the install. It’s important that the network boot code runs before loading the installer from the ISO image (to get the DHCP options, and populate the iBFT). On first boot libvirt may skip the boot order setting and boot the install image directly, in which case the VM needs to be restarted. Otherwise, the iSCSI connection information will not be set in the installer automatically.
Hit TAB, and add “ip=ibft” to the command line before continuing.
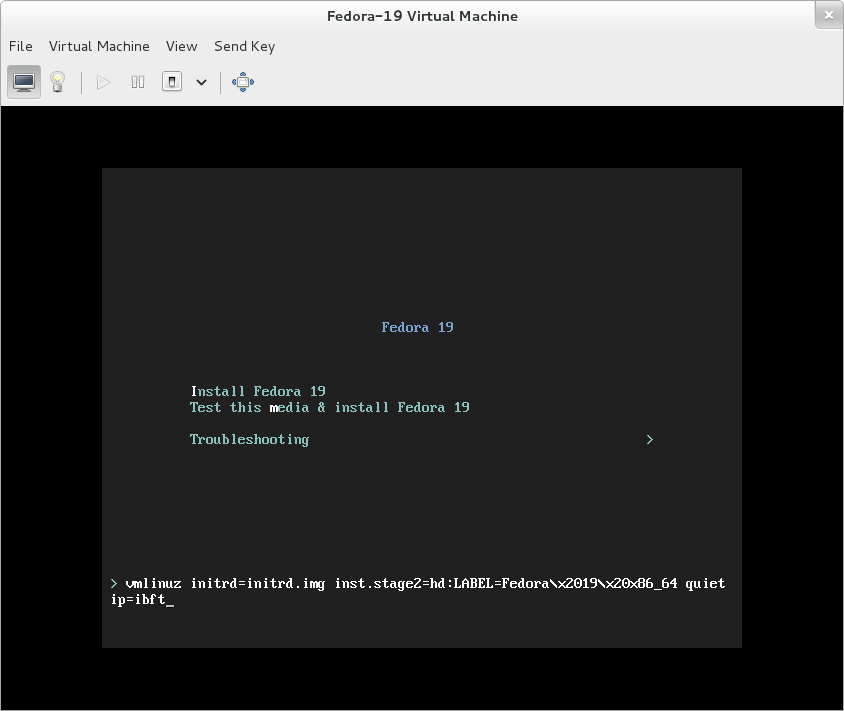
ip=ibft
Changes in the back-end iSCSI support for Anaconda resulted in the iSCSI Boot Firmware Table (iBFT) not being picked up automatically in Fedora 19. Setting the additional option “ip=ibft” on the command line forces iBFT detection on.
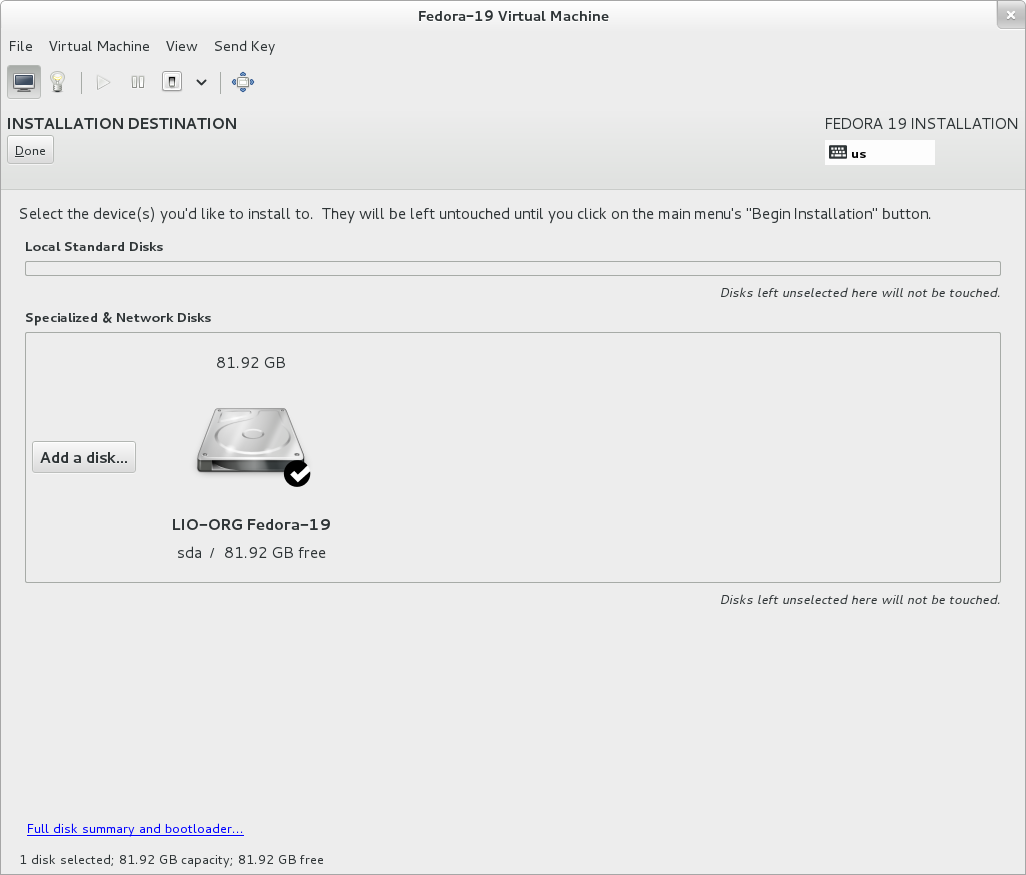
When you get to the storage selection, the iSCSI volume should be setup automatically.
Now just complete the installation and you should be good to go.
reinstalls
With this setup, we want iPXE to connect to the iSCSI volume first and then
continue on to booting from the installer image. That only works when the
iSCSI volume has no valid boot record. In order to reinstall to an initialized
volume, it may be necessary to manually clear the master boot record and
partition table.
$ dd if=/dev/zero of=/dev/vg_guest_images/Fedora-19 bs=1M count=1
Future Enhancements
Obviously there are quiet a few manual steps involved for every VM install here. Much of this can be automated.
A few directions to look at are:
- Using libstoragemgmt and targetd instead of directly using lvm commands and targetcli.
- Using the OMAPI interface to dhcpd to create lease records with the appropriate options set in a running dhcpd process, instead of adding host records to dhcpd.conf and restarting dhcpd.service every time.
- Using virt-install and kickstart files to automate the actual VM setup and OS installation.